Hoodie Hood Construction Guide for Streetwear
Quick answer: Hoodie hood construction should be specified by panel count, lining, opening shape, height, depth, neckline overlap, seam type and drawcord system. A two-panel hood is familiar and efficient; a three-panel hood can create a more shaped crown; a double layer adds structure and weight. Approve the hood on-body, with the actual fabric, before bulk production.
The hood is one of the strongest identity elements on a streetwear hoodie. It changes the profile from the front, the shape from the side and the way the garment sits when the hood is down. A factory cannot reproduce a “large premium hood” consistently without measurements and construction callouts.
For that reason, hoodie hood construction should be treated as a measurable product system rather than a styling note.
This guide explains how brand owners and sourcing teams can document hoodie hood construction for private-label development. It complements our hoodie drawcord guide and the complete streetwear sampling process.
What are the main hoodie hood construction types?
| Hood type | Typical character | Advantages | Sample checks |
|---|---|---|---|
| One-piece hood | Minimal, soft construction | Fewer seams and simple appearance | Crown shape, fold line and opening balance |
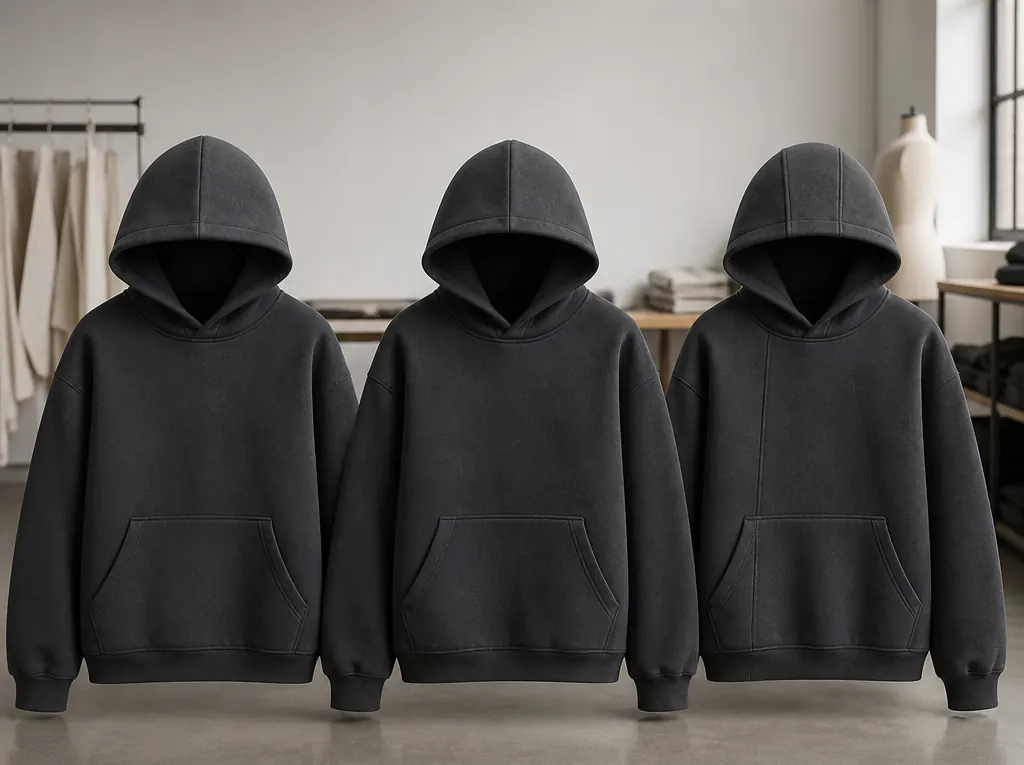
| Two-panel hood | Classic centre-seam profile | Familiar construction and controlled side shape | Centre seam, symmetry and topstitching |
| Three-panel hood | More sculpted crown and depth | Extra shaping through a centre insert | Panel width, notch matching and seam bulk |
| Cross-over hood | Overlapping front neckline | More coverage and strong streetwear profile | Overlap, neck comfort and drawcord clearance |
| Scuba-style hood | Close opening and protective shape | Distinct silhouette | Opening size, visibility and wearer comfort |
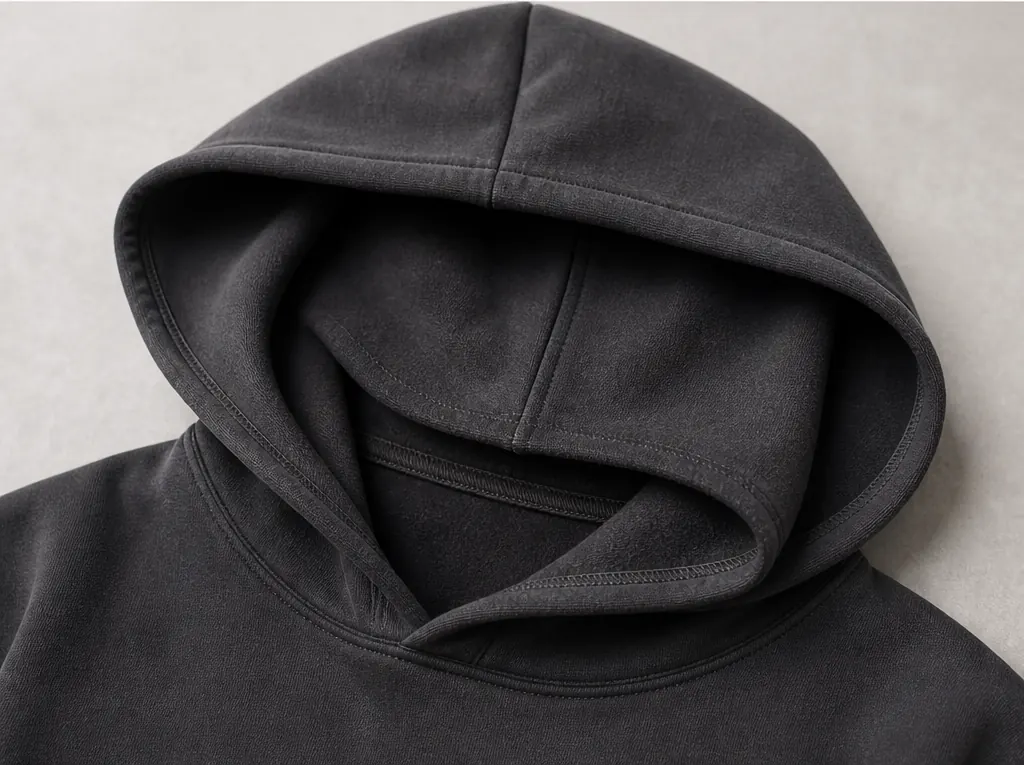
The Hook and Eye hoodie tech-pack guide recommends identifying whether the hood is one-, two- or three-piece, single- or double-layered, and whether the neckline overlaps. Those choices belong on the technical flat and construction page, not in an informal message to the sample room.
How does panel count change hoodie hood construction?
One-piece construction
A one-piece hood can create a simple, relaxed result, but the fold and crown still depend on pattern geometry. It is not automatically flat or cheap-looking. Review the side profile and how the hood collapses on the back when not worn.
Two-panel construction
A centre seam joins mirrored left and right pieces. The curve of that seam controls much of the crown profile. Buyers should inspect whether the seam sits centrally, whether the two sides are symmetrical and whether topstitching remains even around the curve.
Three-panel construction
A centre strip joins two side pieces and can add volume or move seams away from the top of the head. Jiashun Clothing’s hoodie component guide describes a centre gusset strip as a way to deepen and reshape the hood. The result still needs physical approval because panel width, fabric thickness and seam allowances interact.
Should a streetwear hood be single or double layer?
A single-layer hood uses one main shell and needs a clean internal seam finish. It can feel lighter and may drape more softly. A double-layer hood uses an outer and inner layer, often self-fabric or a specified lining. It can feel more substantial and hide internal seams, but it adds material, heat and neckline bulk.
The White Cotton hoodie manufacturing guide treats double-layer construction as one of the key hood decisions. Buyers should not request it only because the word sounds premium. Compare the complete garment at the target GSM, because a very heavy body fabric doubled at the hood can pull on the neckline and affect balance.
Which measurements control hoodie hood construction?
- Hood height from neckline seam to crown
- Hood depth from front opening to back crown
- Face-opening length along the finished edge
- Front overlap or gap at centre front
- Neckline joining length
- Centre-panel width for a three-piece hood
- Finished channel width where a drawcord is used
- Eyelet or buttonhole position from centre front and neckline
- Topstitch distance from hood seams and opening
- Finished seam and lining thickness
Show the measurement paths on a diagram. “Hood depth” can mean different routes to different technicians, so every code needs a visible start point, endpoint and method.
How should hoodie hood construction join the neckline?
The neckline seam carries the weight of the hood and determines how it lies on the shoulders. The pattern must distribute the hood joining length correctly around the neck opening. Excess feeding can create gathers or puckering; insufficient length can pull the front neckline upward.
The approved hoodie hood construction should therefore identify the neckline join and internal finish as clearly as the visible crown shape.
Specify seam type, seam allowance, reinforcement, neck tape or binding where used, and topstitching. Check the inside for scratchy edges and concentrated bulk, particularly at centre front overlaps and centre-back seam joins.
What should be specified around the face opening?
The edge may be turned, bound, faced or constructed as part of a double layer. If a drawcord channel is present, define its finished width, stitch path and relation to eyelets or buttonholes. The cord system should be reviewed for the destination market and intended wearer; do not transfer adult measurements directly into youth products.
When no drawcord is used, the opening still needs a controlled finish and enough structure to hold the approved shape. The buyer should decide whether the edge should stand, roll slightly or lie flat.
How do fabric weight and finish affect the hood?
Heavyweight fleece, loopback French terry, jersey lining and woven reinforcement create different behaviour. Brushing can add loft, while washing can soften the cloth and reduce apparent structure. Test the actual colour and finish because dyeing and garment processes can change hand feel.
A hood approved in substitute fabric should remain a development reference only. Before bulk release, confirm it in the production fabric and treatment. Our French terry versus fleece guide provides a separate material comparison.
How should a hoodie hood sample be evaluated?
- Verify the pattern identity: Confirm panel count, revision and cut quantity.
- Measure the hood flat: Use the agreed POM diagram without stretching.
- Inspect symmetry: Compare left and right opening edges, panel seams and drawcord exits.
- Try it on: Assess visibility, head movement, front coverage and pressure at the neck.
- Check the down position: Confirm how the hood stacks across the back and shoulders.
- Test the opening: Pull and release the edge, then inspect seam and stitch recovery.
- Wash and condition: Remeasure, check twisting and review lining or shell shrinkage.
- Photograph approval views: Record front, side, back, inside and close construction details.
Common hood development problems
The hood looks flat or collapses
Review depth, crown curve, panel count, fabric body, lining and seam construction. Adding weight alone may make the hood heavier without creating the intended shape.
The front neckline pulls upward
The hood joining length, overlap, fabric weight or shoulder balance may be incorrect. Check the full garment pattern rather than changing only the opening.
The centre seam twists
Possible causes include inaccurate cutting, asymmetric panels, grain direction, sewing feed or differential shrinkage. Compare the pattern pieces and remeasure after washing.
The double layer feels too bulky
Review fabric weight, seam allowances, neckline finishing and lining choice. A lighter compatible lining may support the visual target more effectively than doubling a very heavy shell.
Hood construction approval checklist
Use this hoodie hood construction checklist for the final development sample and retained bulk standard.
- One-, two- or three-panel construction identified
- Single layer, self-lined or separate lining specified
- Opening, height, depth and neckline POMs diagrammed
- Front overlap and drawcord system approved
- Seam type, topstitch and inside finish documented
- Production fabric and wash finish used for final sample
- On-body front, side and back views accepted
- Post-wash shape and symmetry checked
Frequently asked questions
Is a three-panel hood better than a two-panel hood?
Not automatically. A three-panel pattern provides another shaping option, while a two-panel hood may achieve the desired profile with fewer seams. Approve the actual sample.
Does a double-layer hood always look more premium?
No. It can add structure and a clean inside, but poor fabric choice or excessive bulk can reduce comfort and garment balance.
How large should a streetwear hood be?
The answer depends on the intended silhouette, neckline, shoulder fit, fabric and wearer. Define measurable height, depth and opening instead of requesting “oversized.”
Can the hood use a different fabric inside?
Yes, if stretch, shrinkage, colourfastness, hand feel and seam compatibility are approved together.
Should drawcord holes use eyelets or stitched buttonholes?
Either may work. Specify appearance, reinforcement, dimensions, material and destination requirements, then inspect the finished sample.
What views belong in a hood tech pack?
Include front, side and back flats plus enlarged views of the crown seams, opening, neckline join, lining and drawcord exits.
Conclusion
Hoodie hood construction becomes repeatable when silhouette words are translated into panel geometry, measurements, materials and seam instructions. Approve the shape worn and down, inspect it after washing, and freeze the final revision before bulk cutting.
Developing a private-label hoodie? Contact Aimer Custom Lab through the website with your technical flat, fabric target, size range, hood references and intended wash. Confirm sampling, material availability, MOQ and production timing for the specific project.