Streetwear Buttonhole Specification Guide
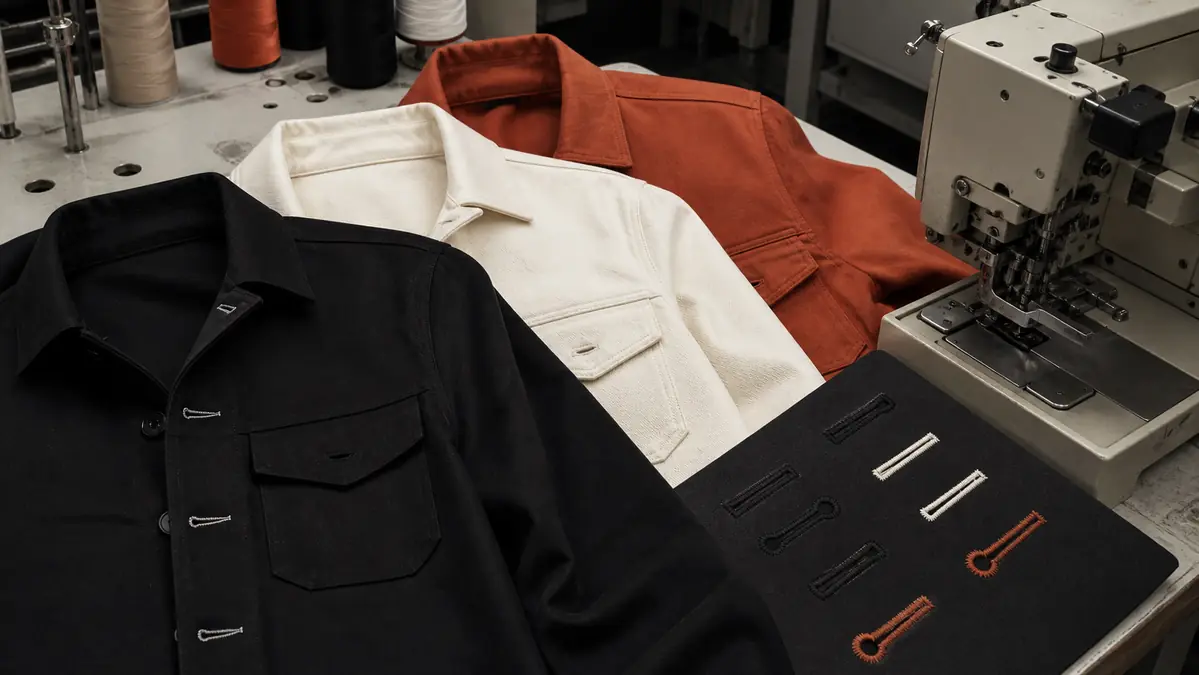
Streetwear buttonhole specification converts a familiar opening into a measurable manufacturing requirement. Buttonhole type, finished length, stitch density, thread, stabilizer, cutting sequence and placement all affect whether a jacket, overshirt or trouser closes cleanly and survives repeated use without fraying or distortion.
Quick Answer: What should a streetwear buttonhole specification include?
Name the buttonhole type, finished cut length, overall stitched dimensions, position and orientation; then define thread, stabilizer, stitch density, cutting sequence and appearance criteria. Approve it with the real button and layered shell, test repeated fastening and care, and seal the machine program plus sample before bulk production.
What is a garment buttonhole?
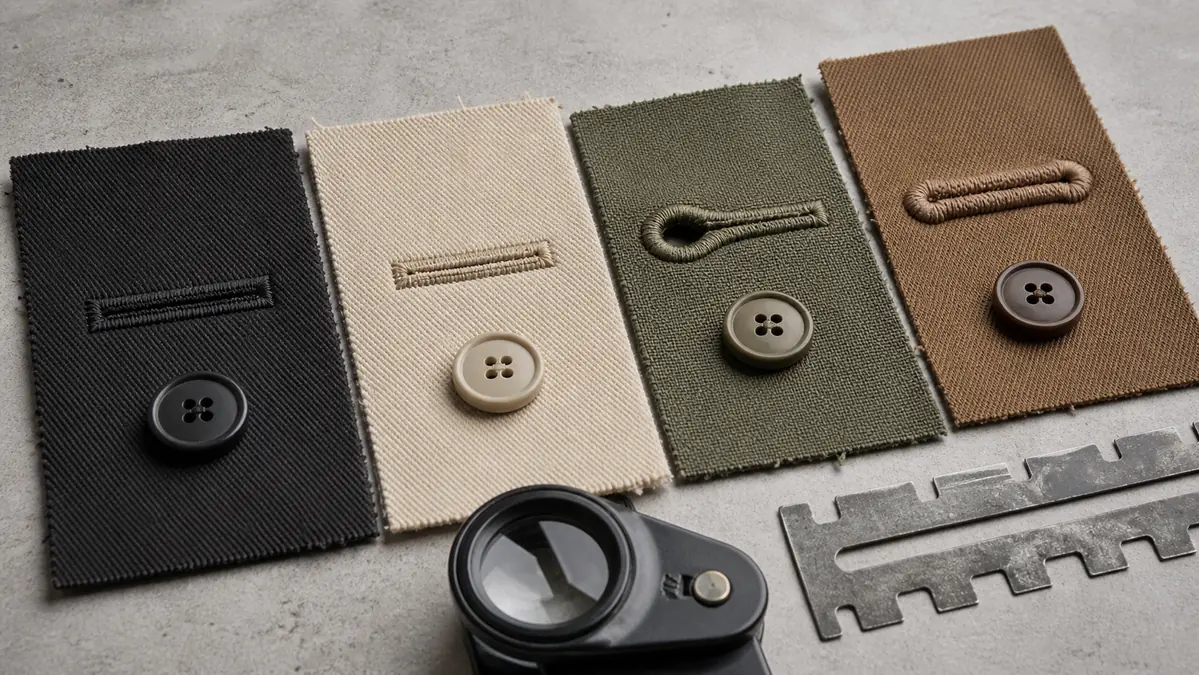
A buttonhole is a reinforced slit that lets a button pass through the garment. Stitching secures the cut edge and distributes local stress. Industrial machines can form straight, rounded-end, keyhole and programmed shapes with controlled bartacks, eye ends or gimp cord. The correct shape depends on button geometry, fabric, garment style and expected load.
A streetwear buttonhole specification must separate the cut opening from the total stitched outline. Buyers who write only “25 mm buttonhole” leave room for different interpretations. The drawing should identify whether the dimension means cut length, inside opening or overall outside length, and how much tolerance is acceptable.
Which buttonhole type fits the product?
| Type | Typical visual feature | Possible use | Risk to confirm |
|---|---|---|---|
| Straight buttonhole | Linear opening with compact ends | Shirts, light overshirts, cuffs and small tabs | Cut-edge fray and end security |
| Rounded-end buttonhole | Softer shaped end | Casual jackets and visible design details | Shape consistency on thick layers |
| Keyhole buttonhole | Round eye at the stress end | Tailored or heavy outerwear with shank buttons | Eye direction, gimp and bulky seam transitions |
| Corded or gimped buttonhole | Raised, structured stitch edge | Premium outerwear or prominent closures | Excess bulk, cord exposure or uneven feeding |
| Decorative programmed shape | Custom outline or contrasting thread | Selected streetwear identity details | Function must remain clear and repeatable |
Style names vary among factories and machine suppliers. Include an approved image and a dimensioned drawing so the visual intention is not lost in translation. The functional opening should remain the priority even when the buttonhole is a design feature.
How is the correct buttonhole length determined?
Start with the actual production button. Diameter alone is not enough because thickness, shank, edge profile and material affect how it passes through the opening. A flat four-hole button behaves differently from a thick shank button of the same diameter. Build trials around the real part and layer stack.
The opening should allow intentional fastening without falling open or forcing the user to stretch and damage the fabric. Measure after the buttonhole is sewn, cut, finished and conditioned. If garment washing changes shrinkage or hand, verify length again after that process. Record both target and tolerance in the streetwear buttonhole specification.
How should placement and orientation be controlled?
Locate the buttonhole from stable pattern reference points, such as center front, finished edge, collar stand seam or pocket reference notch. State whether it is horizontal, vertical or angled. Horizontal placement can resist opening forces differently from vertical placement, so orientation is functional as well as visual.
For a series, identify the first and last positions and the spacing method. Do not distribute accumulated error across the placket without an agreed rule. Match button placement after the buttonholes are approved, checking that the closed garment remains aligned and does not twist.
What role do interlining and layer balance play?
A buttonhole machine feeds and stitches the entire local stack. Uneven seam allowances, loose lining, bulky facings or unsupported stretch fabric can change length and shape. Stabilize the area so the stitch field remains flat but does not become boardy. Trim or grade seam bulk according to the approved construction before sewing.
Heat-bonded support may be suitable for some plackets and jacket fronts. Our streetwear fusible interlining guide explains how shell, adhesive and fusing conditions are validated. If a removable or sewn support is used instead, record material, size, orientation and removal method.
Which thread and needle variables matter?
Thread size and construction
Thread must form a dense edge without excessive bulk. Fine thread can give a clean outline but may not cover a raw edge under the chosen density. Heavy thread can produce a raised look but may require different tension, needle and button clearance. Confirm color and shade under the intended lighting.
Needle point and size
Select the needle for shell fiber, fabric construction, thread and machine. An incorrect point can cut knit yarns or deflect on dense layers. Inspect both face and reverse for holes, skipped stitches and heating damage. Replace worn needles before they create a recurring defect.
Gimp or cord
Some buttonholes use a reinforcing cord beneath the stitches. It can add shape and body, especially around a keyhole, but it must remain enclosed and compatible with care. State the material and color instead of leaving it to operator preference.
Should the opening be cut before or after stitching?
Machine systems may cut before stitching, after stitching or use another programmed sequence. Cut-before can expose the edge during formation; cut-after can risk damaging finished stitches if the knife setting is wrong. Neither sequence is universally superior. Approve the sequence that gives consistent edge coverage and clean opening on the actual material.
Record knife size, cut position and whether the eye is punched separately. The operator should check for uncut fibers, overcut ends and loose fragments. A worn or misaligned knife can create fraying even when the stitch pattern is correct.
How should stitch density and tension be approved?
Density should cover and secure the edge without making the area rigid or perforating the shell. Thread tension must balance face and reverse formation. If bobbin thread shows excessively on the face, or the top thread forms loops on the reverse, identify the machine cause rather than trimming the symptom.
Use a sealed appearance sample and measurable program settings. The JUKI MEB-3200 product information illustrates programmable eyelet-buttonhole functions and machine-controlled shape parameters; the exact settings still depend on the garment, material and approved visual standard.
What defects should inspection identify?
- Incorrect length, width, position, angle or orientation.
- Open, loose or missing bartack at one end.
- Skipped stitches, thread breaks or exposed gimp.
- Overcut end, incomplete cut or untrimmed fibers.
- Puckering, twisting or shell perforation around the stitch field.
- Raw edge visible beyond the stitch coverage.
- Button does not pass comfortably or closure falls open.
- Shade mismatch, contamination or inconsistent face appearance.
How should performance be tested?
Begin with repeated fastening and unfastening using the production button. Inspect stitch abrasion, end security, fabric distortion and ease of use. Then apply the intended care sequence and repeat the review. For outerwear or work-inspired styles, add a controlled pull or seam-opening test agreed with the buyer and laboratory.
Record failure mode. If fabric tears before stitches, changing only thread density may not solve the problem. If the cut runs beyond the bartack, knife setting or end design may be responsible. A useful streetwear buttonhole specification links the defect to the construction variable that can be corrected.
What is the pre-production approval workflow?
- Approve the button. Record component code, diameter, thickness, shank and finish.
- Build the real layer stack. Include shell, facing, lining, interlining and seam allowances.
- Trial shapes and lengths. Compare function, edge coverage and appearance.
- Set thread and needle. Confirm color, size, point, tension and gimp if used.
- Test sequence and care. Cycle the closure, wash or clean and remeasure.
- Seal the program. Save machine code, knife, dimensions and reference sample.
- Confirm placement. Check button alignment on the complete garment.
The streetwear clothing sampling process helps coordinate this component decision with fit, grading and decoration. Placement tolerances should also align with the garment measurement tolerance guide.
How should bulk production be controlled?
Approve first-off samples at every line start, thread change, knife change, fabric lot or machine program change. Compare position, dimensions, stitch formation, cut and reverse appearance with the sealed sample. Use templates or guides where appropriate, while ensuring the garment lies naturally rather than being stretched into position.
Schedule repeated checks across operators and production time. Inspect the button together with the buttonhole on selected completed garments. If a defect affects function or fabric integrity, isolate the affected bundle and trace it to the machine and setting period.
What belongs in a streetwear buttonhole specification?
- Button code, dimensions, profile and intended orientation.
- Buttonhole type, cut length, stitched dimensions and tolerance.
- Location from stable references, spacing and direction.
- Shell, lining, facing, interlining and seam layer stack.
- Thread, bobbin, needle, gimp and approved color.
- Stitch density, end treatment, knife and cutting sequence.
- Appearance, function, care and bulk inspection requirements.
- Machine program, sealed sample and corrective-action rule.
Frequently Asked Questions
Is buttonhole length equal to button diameter?
Not necessarily. Button thickness, shank, profile, fabric thickness and intended ease all matter. Approve trials with the real button.
Should heavy jackets always use a keyhole?
No. A keyhole can suit some shank-button and outerwear applications, but style, layers and performance should drive the choice.
Can placement be measured before washing?
Initial placement is necessary, but garments with a wash process should be rechecked after that process because shrinkage and relaxation can alter alignment.
Does more stitch density prevent fraying?
Only to a point. Excess density can perforate or stiffen fabric. Balance thread coverage, needle penetration, cutting and support.
What causes a buttonhole to gape?
Possible causes include excessive opening length, weak end treatment, unstable layers, poor orientation or mismatch with the button. Diagnose the complete closure.
Can buttonholes be repaired in bulk?
Some loose threads can be corrected under an approved method, but overcuts, misplacement and damaged fabric usually require rejection or authorized rework.
Conclusion: Approve closure function and visual identity together
A complete streetwear buttonhole specification defines geometry, placement, layer support, thread, needle, cutting and testing as one closure system. The JUKI MEB-3200 technical page is a useful machine-capability reference, while the production program must be validated on the buyer’s actual materials.
Developing a jacket, overshirt or trouser closure? Contact Aimer Custom Lab with the button, layer stack, design drawing and care process. We can align the buttonhole trial and approval checklist before bulk production.